Restrict or Configure the Number of Colored Pages Printed
Use this feature to restrict the number of color pages produced from this device. For unrestricted color usage, select Enable color. To only allow black pages, select Disable color. To restrict color based upon the computer application used to print the job or upon user permissions, select Set custom color access.
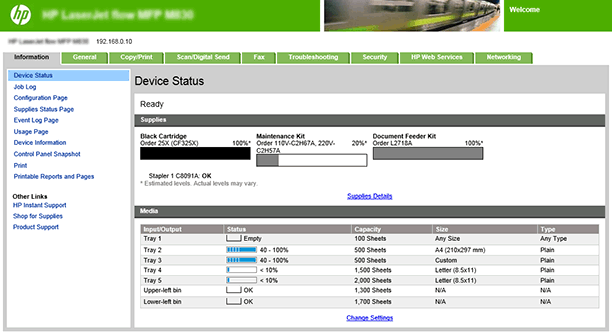
Step one: Access the HP Embedded Web Server (EWS)
- 1.
From the Home screen on the printer control panel, touch the Network  button to display the IP address or host name.
- 2.
Open a Web browser, and in the address line, type the IP address or host name of the printer exactly as it displays on the
printer control panel. Press the Enter key on the computer keyboard. The EWS opens.


NOTE:If the Web browser displays a message indicating that accessing the website might not be safe, select the option to continue
to the website. Accessing this website will not harm the computer.

Step two: Configure the color settings using the Restrict Color feature
Access the Restrict Color feature using the following steps:
- 1.
Click Copy/Print from the top navigation tabs.
- 2.
Click Restrict Color in the left navigation pane.
This section provides information about the following topics:
The Main Color Setting area of the Restrict Color page provides three methods for managing color use on the printer:
- •
Method one: Enable Color
Select Enable color to print all color print jobs in color.
- •
Method two: Disable Color
Select Disable color to print all color print jobs in black or grayscale only.
- •
Method three: Set custom color access
Select Set custom color access to define the color printing capability for computer programs, or to print color jobs in black or grayscale only if the user
or group does not have permission to print in color.
Use the Set custom color access method to define the color printing capabilities for specific computer programs:
- 1.
Select the Set Custom Color Access option.
- 2.
Select the Restrict color printing for some computer applications check box.
- 3.
Set a default color control setting by selecting from the Default color control for computer applications drop-down list in the Restrict color printing for some computer applications area. The color-control choices are:
The Default color control for computer applications setting applies to print jobs originating from computer programs that do not have a specific color control associated with
them.
- 4.
Click Add to apply a color control setting to a specific computer program:
- a.
Enter the name of the program to apply a color control setting to in the Application Name field.
- b.
Select a color control type from the Color Control drop-down list.
- c.
- 5.
Click Edit to modify the color control setting for a software program from the list of programs that have a color control setting specified.
- 6.
Click Remove... to remove a software program from the list of programs that have a color control setting specified.
Use the Set custom color access method to restrict color printing by a user or group:
- 1.
Select the Set Custom Color Access method in the Main Color Setting area.
- 2.
Select the Restrict color by user or group permissions check box.
- 3.
The following users/groups can have their access set:
The following levels of access are available for setting:
- 4.
Click the Manage Permission Sets... button to add, edit, copy, or delete a permission set.
- 5.
Click the Go to Access Control Page button to open the Access Control page on the Security tab of the EWS and view detailed access control settings.
The Color Usage Job Log displays the following information about the printer and the color prints jobs processed through the
printer:
- •
- •
- •
Job Log
- ◦
The Job Log area contains specific information about color print job processed through the printer, including date/time, the print job
user, the print job name, the application the print job came from, and information about the number of sides and sheets for
the print job.
Step three: Complete the setup
On the Restrict Color page, review the selected settings, and then click Apply to complete the setup.


 button to display the IP address or host name.